How to configure Windows Firewall manually
If you're running Clicker Desktop version 1.5 or older, or if you'd like to manually configure Windows Firewall on you computer, please follow this guide.
NOTE. With Clicker Desktop 1.6 or newer the firewall configuration had been implemented into the app.
Once you run the app for the first time. You will be prompted with Firewall window like the one below.
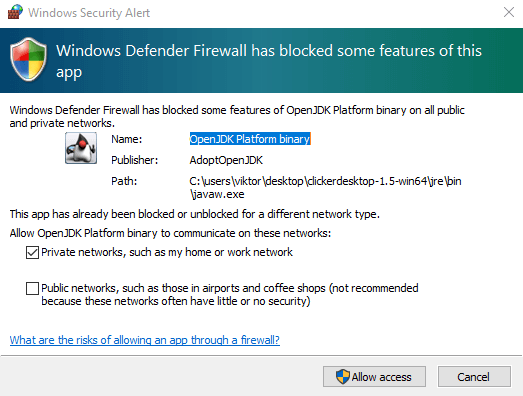
You should allow Clicker Desktop to run in appropriate network for your use cases. Make sure to select Private networks. Depending on your use cases, you might also want to select Public networks although generally it is not recommended.
IMPORTANT NOTE. Antivirus software usually has its own firewall. If you have antivirus installed, please check your antivirus support on how to allow the app to run through antivirus firewall. If your antivirus requires entering port number, use 17381.
How to check current network type (Private or Public)
- Open the Control Panel
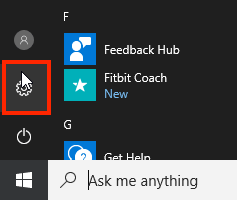
- Click Network & internet tile.

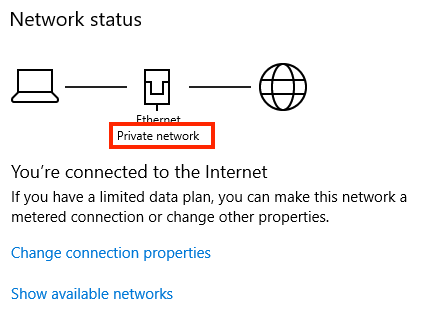
- Under Network Status title, you'll see the text Private Network or Public Network.
How to change current network type
-
Follow the steps from How to check current network type guide.
-
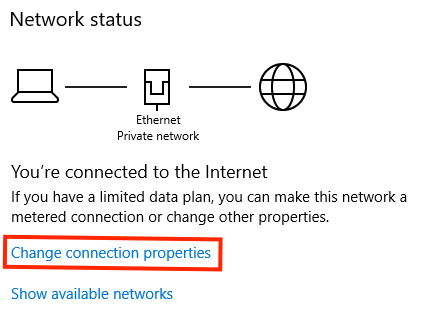
Under Network status title, follow the link Change connection properties.
- Under network profile title, select either Private or Public.
How to change firewall settings for Clicker Desktop
All steps described in this section are performed on Windows 10. These steps are the almost the same in previous versions of Windows, back to Windows 7.
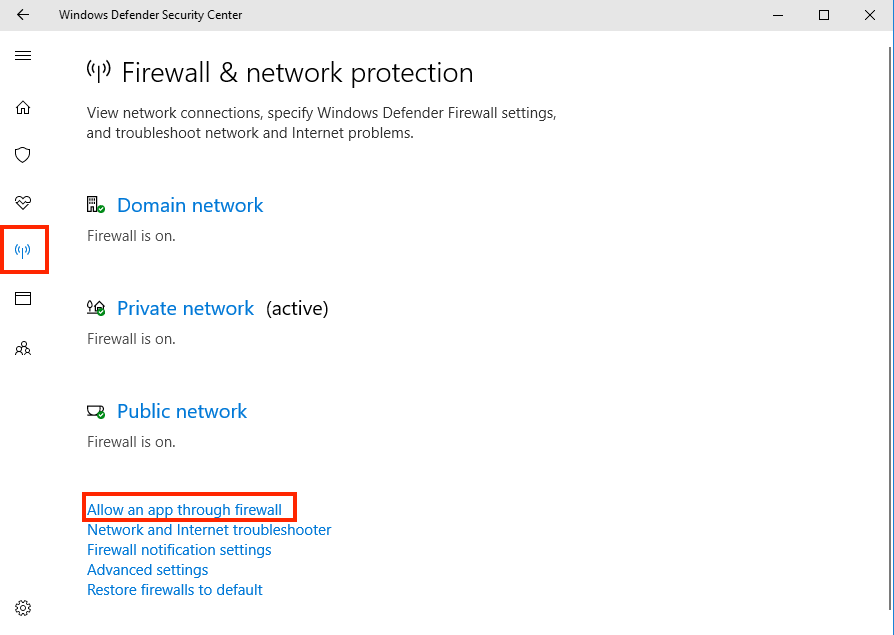
- Open the Control Panel
- Open Windows Defender Security Center

- In the left side menu select Firewall & network protection and then click the Allow an app through firewall link
- Click the Change settings button
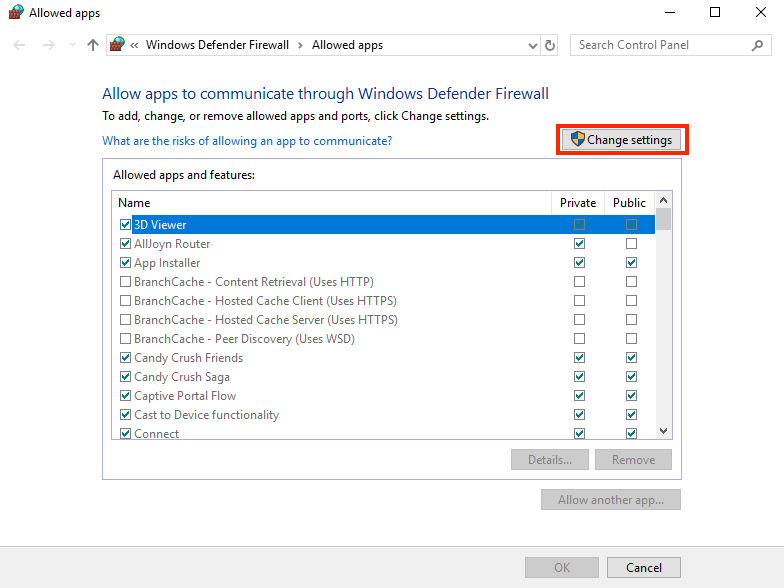
- Find Clicker binary in the list.
NOTE. Clicker Desktop uses Java to run. That's why you actually need to allow Java binary to run instead of the
launcher. The name of the binary would be either javaw.exe or OpenJDK platform binary.
NOTE. If you can't find java binary in the list, skip this step, and go to the next one.
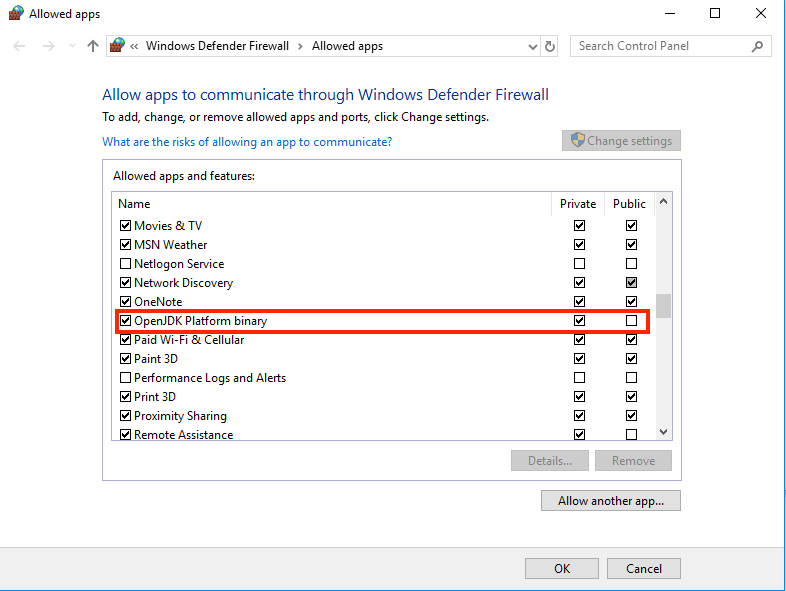
Set checks under Private / Public, to allow Clicker Desktop to run in those networks.
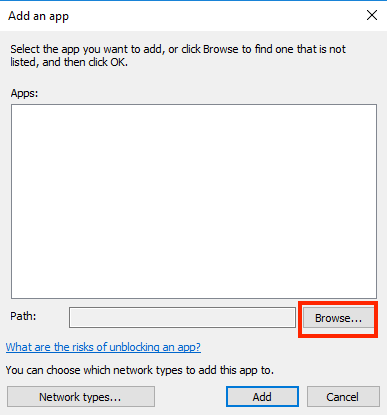
- If OpenJDK platform binary isn't in the list, click Allow another app button.
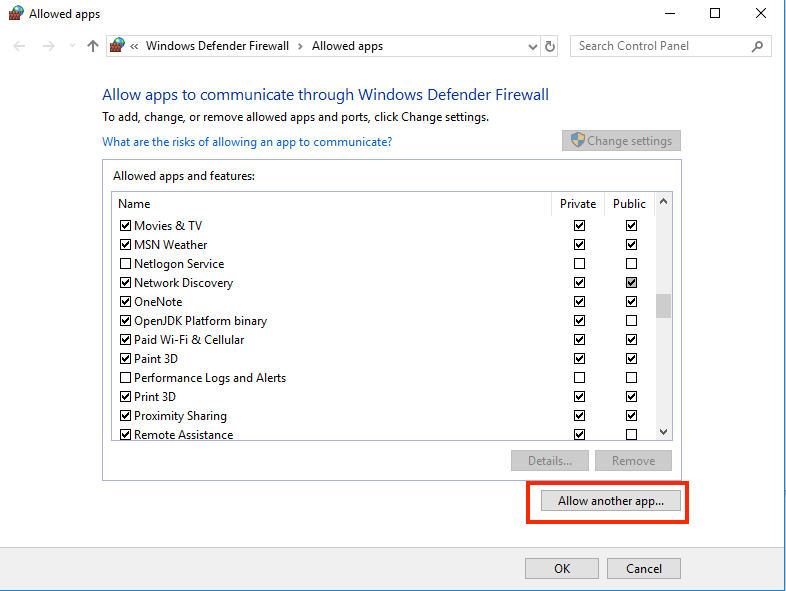
- If the new dialog, click Browse button.
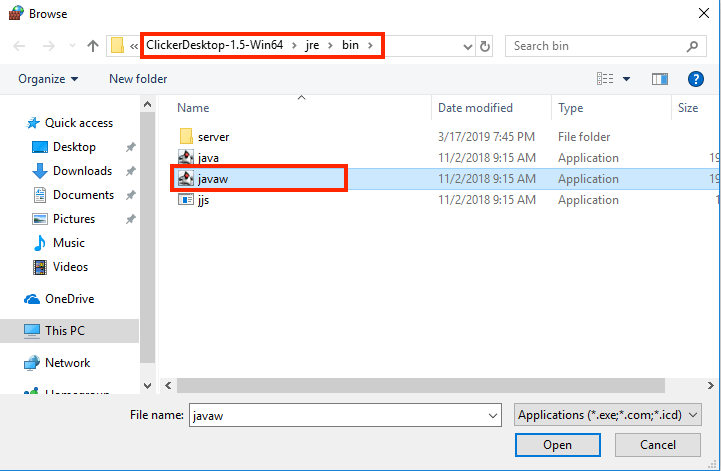
- In the open file dialog, go to the location where Clicker Desktop is stored, and select file
jre\bin\javaw.exe, click Open and then Add.
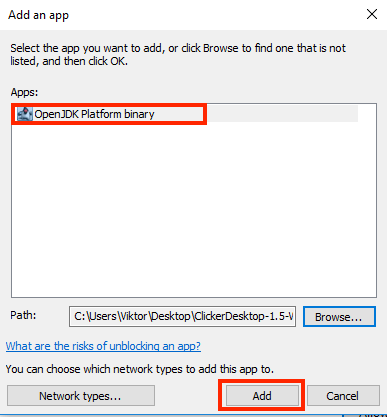
- Follow step 5.