Give accessibility permission mac
Give Accessibility permission to the app
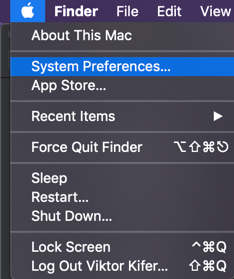
- Click the Apple symbol in your OS X menu bar and open System Preferences.
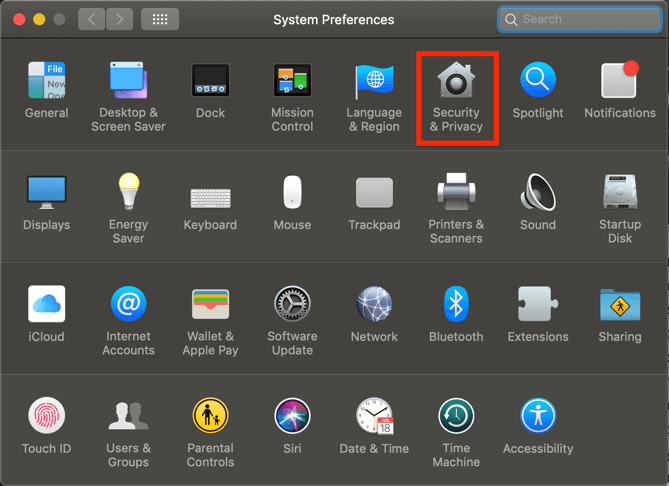
- Choose Security & Privacy.
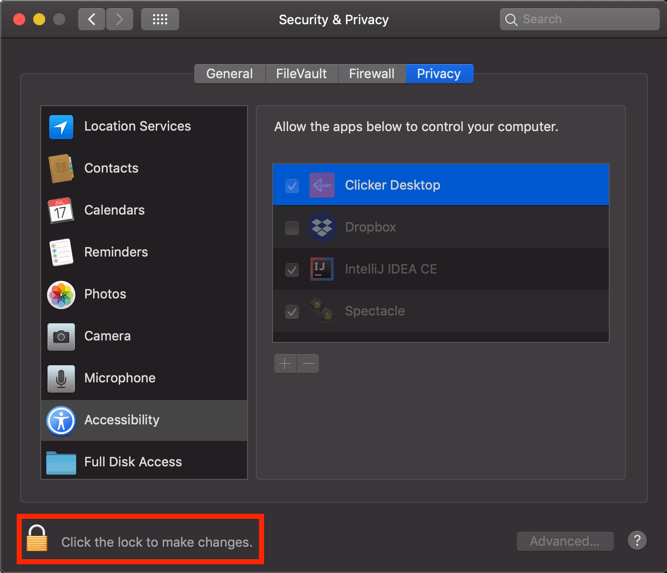
- From the Security & Privacy panel open the Privacy tab and select Accessibility.
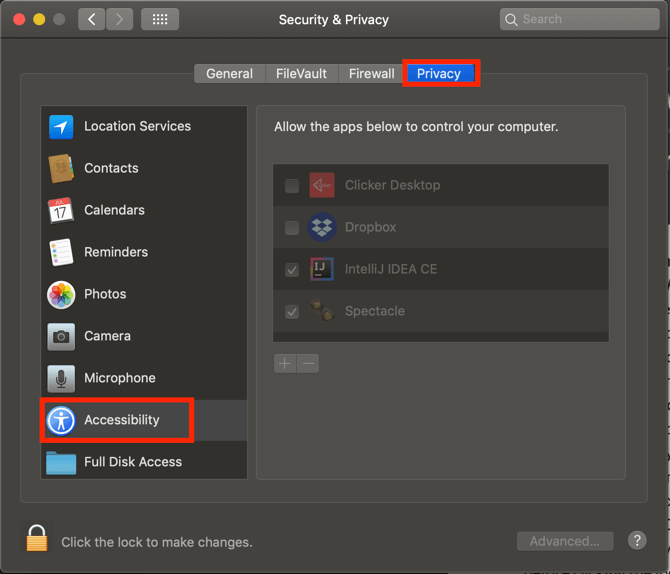
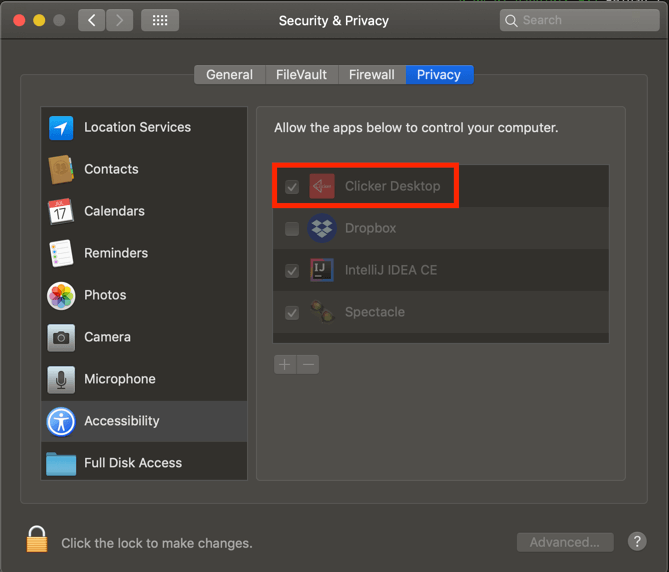
- Look at the list labeled "Allow the apps below to control your computer" and see if Clicker Desktop is both listed and checked. If it is present and checked, no further action is needed.
- If Clicker Desktop is on the list and not checked, click the lock at the bottom of the modal window to make changes.
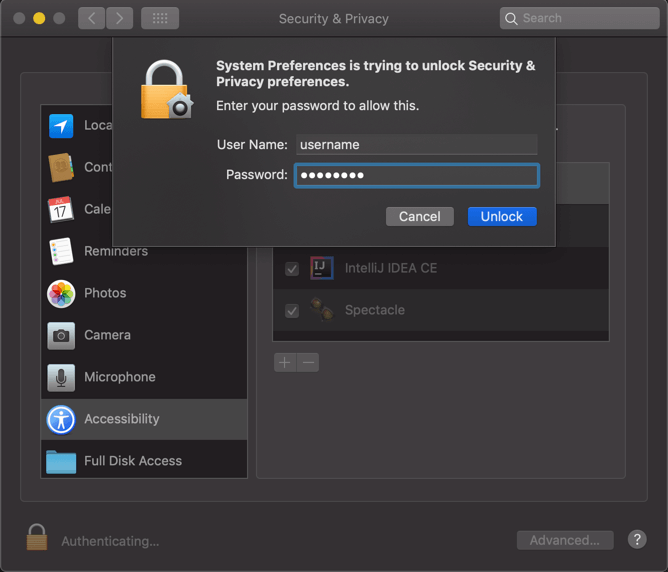
- Once you click the lock you'll be prompted to enter your computer user name password. You can then check the box next to the Clicker Desktop icon.
IMPORTANT Make sure to click the lock again to commit the changes you made.
- If Clicker Desktop is not present on the list click the lock so you can make changes. You'll be prompted to enter you password. Click the + sign and find Clicker Desktop in your Applications folder. Once you double-click the application will automatically be added to the "Allow the apps below to control your computer" list. Make sure to check the box next to it before clicking the lock again.
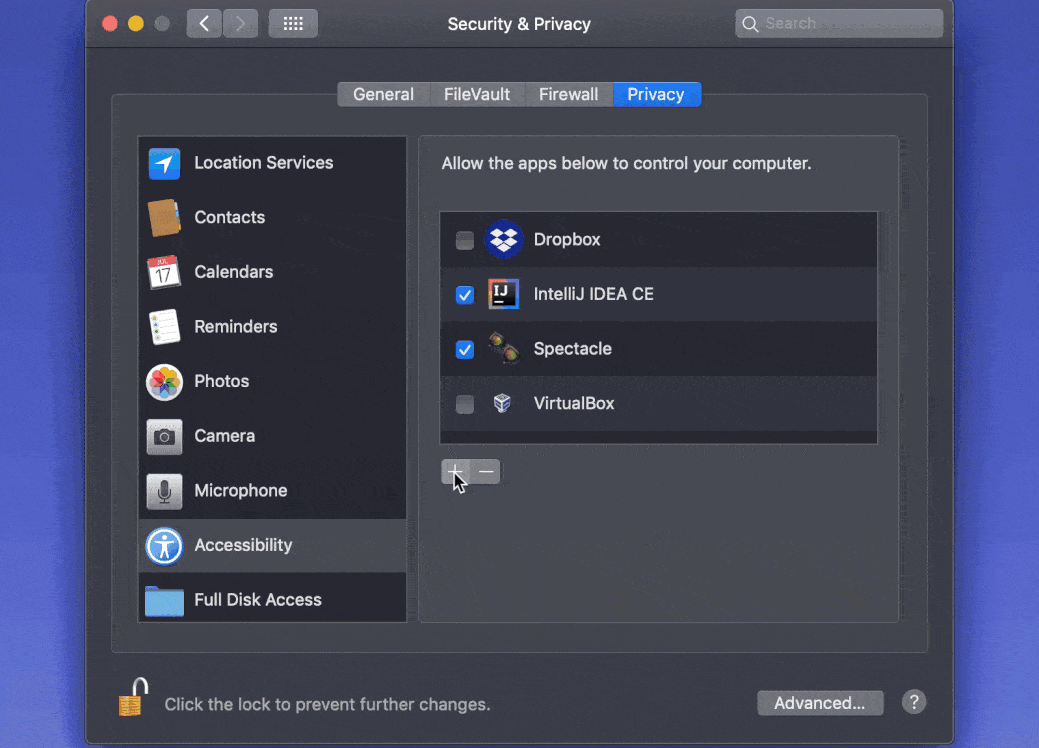
IMPORTANT Make sure to click the lock again to commit the changes you made.